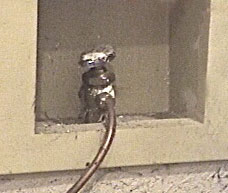
How To Inspect the Supply Linecontinued from page 1 Remove any kinks you find, and adjust the tubing to prevent the kink from reoccurring. If necessary, use duct tape or some other fastener to hold the tubing in place. If the kink cannot be removed, it will be necessary to replace the tubing. Be sure to use a "food grade" quality of tubing suitable for transporting potable water. When you reach the water supply valve, also verify that it is turned on to supply adequate pressure. Next, inspect the water line from the inlet valve up the back of the freezer to where it disappears inside the freezer.
If the tube is leaking from any location other than a connection, it will be necessary to replace the tubing. If possible, replace the entire length of tube. However, if access or some other issue makes replacement difficult, you may be able to successfully splice in a piece of tubing. Note though that splices are more prone to leaks and may result in the need for a future repair. If a leak occurs at a connection, attempt to tighten the connection. Leaks might also be stopped with the use of a rubber washer inside the connection or with the use of teflon tape wrapped around the threads of a connection. If you can find no constriction that is preventing the flow of water. Try turning off the water at the source, disconnect the supply line from the inlet valve, place the supply line in a bucket and then turn on the water. If water flows freely then you have confirmed that water is getting to the water inlet valve. page 2 of 2
|
 |
|


